
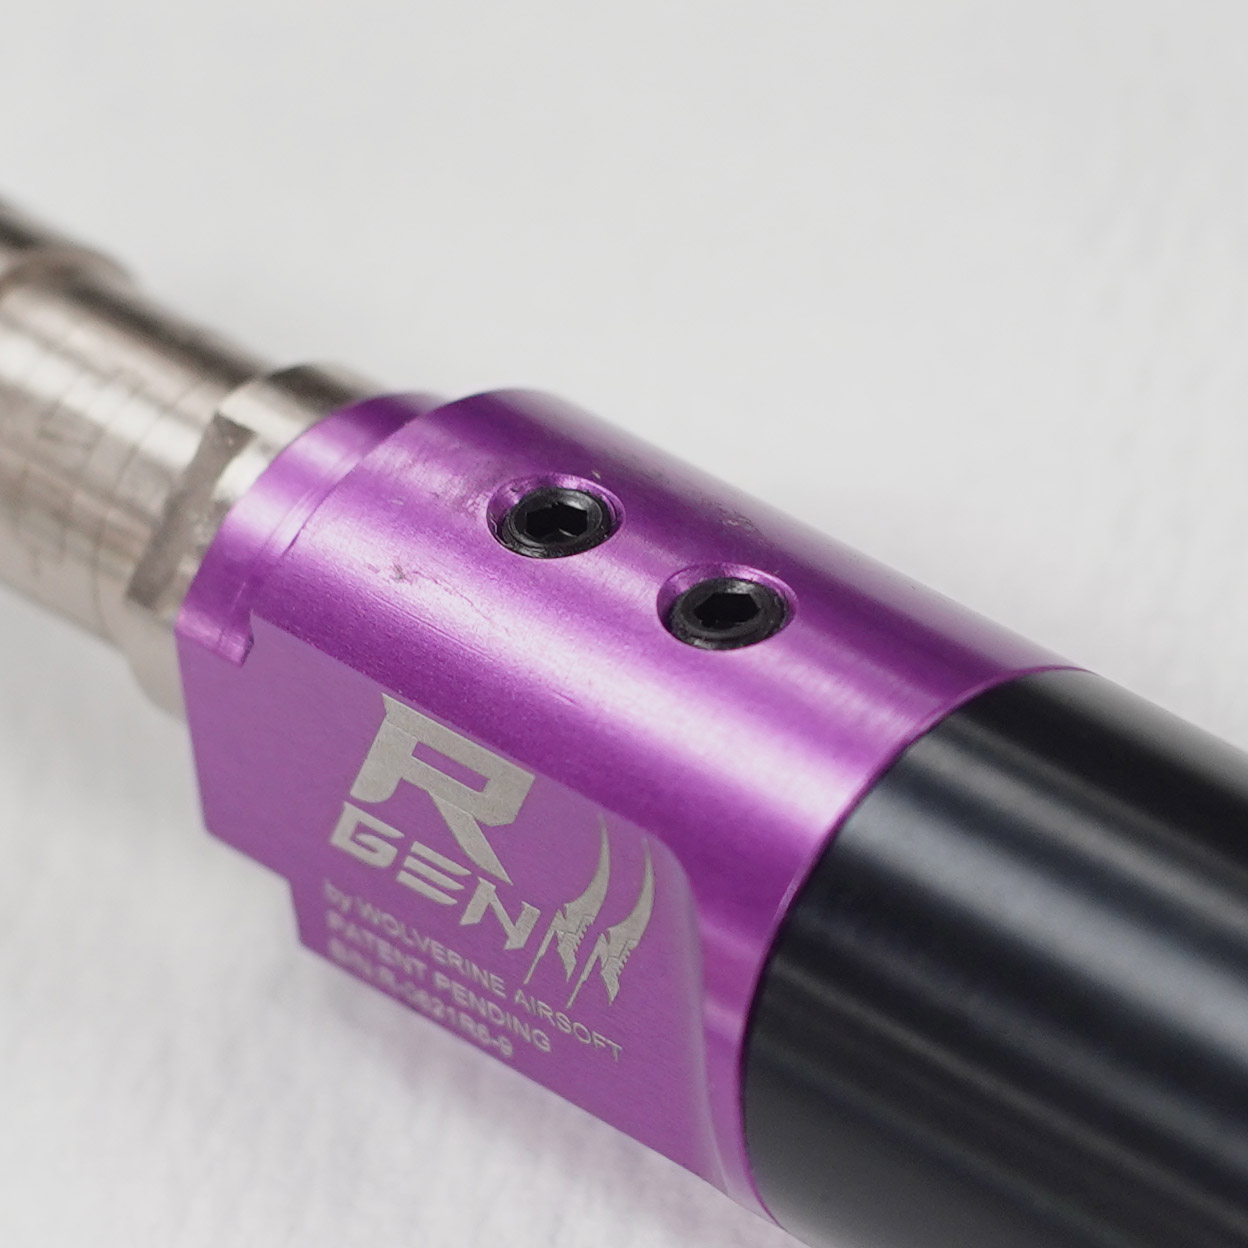
Tag: inferno
Owner’s Manual for INFERNO Gen 2
AEG Selector Plate Troubleshooting
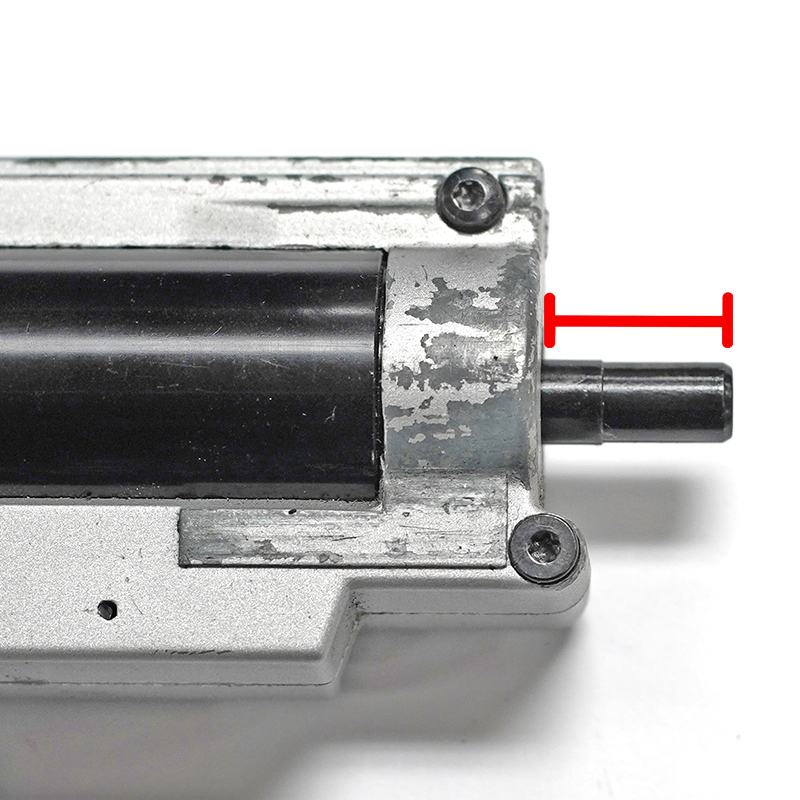
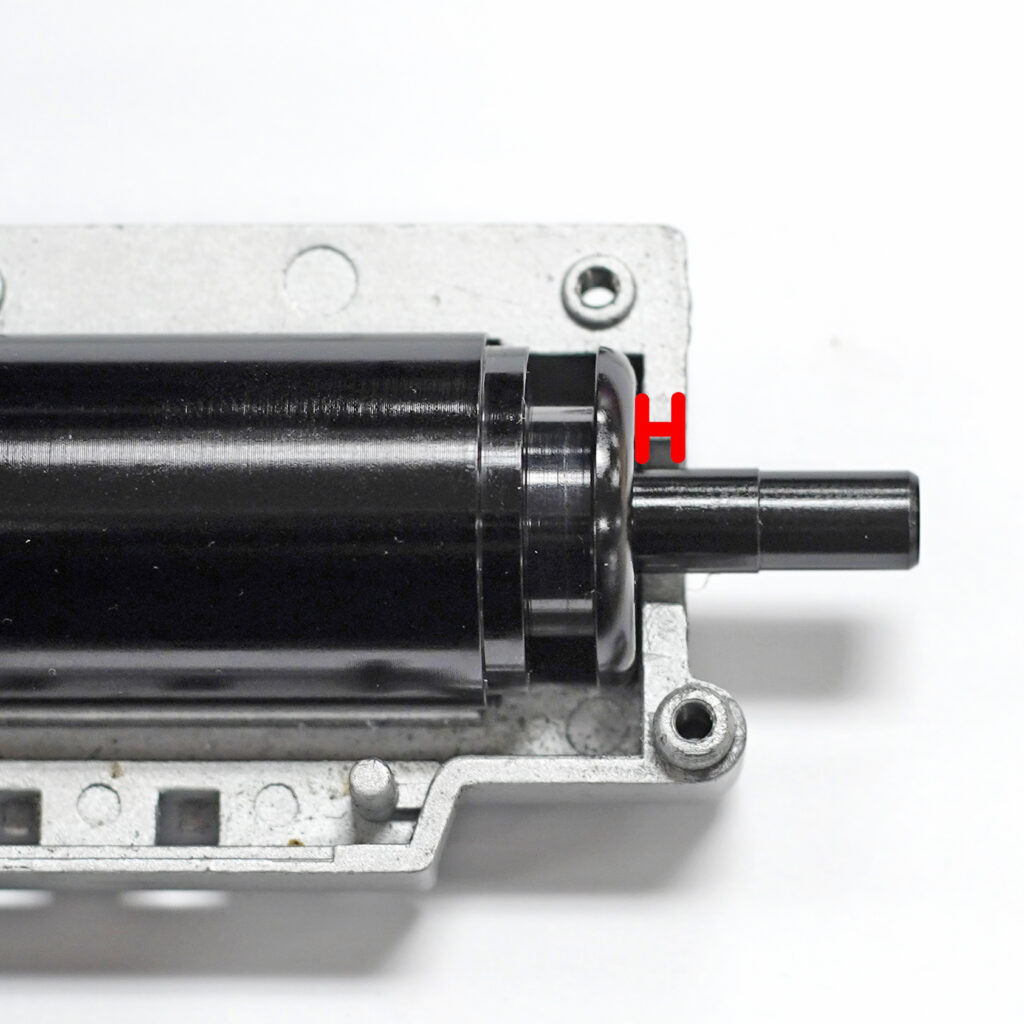
Nozzle Measurement
If you can’t find a nozzle specific to your replica, you can determine the correct nozzle by measuring the two distances indicated below and adding them together. Then choose a nozzle from the list that is 0 to 0.5mm longer than your measurement.
Original Engine
Wolverine Engine
| Nozzle | Length(mm) |
|---|---|
| CA LMG | 17.75 |
| M249 | 18.75 |
| M4 | 19.25 |
| AK | 19.65 |
| KA FAL | 21.5 |
| G36 | 24.5 |
| CA SCAR L | 25.75 |
| PTS Masada | 27.5 |
| VFC XCR | 29 |
| A&K Masada | 33.32 |
| GG SR25 | 35.05 |
| VFC SCAR H | 36 |
| KA SIG 556 | 47.4 |
Note: A&K SR25 and FAL nozzles are interchangeable. If you need a Gen 1 nozzle, select FAL. If you need a Gen 2 nozzle, select A&K SR25.
General Engine Maintenance
Regular maintenance on an HPA engine should be performed every 25-50k rounds depending on the conditions it is being used in. The dustier and dirtier the conditions, the more frequently it should be serviced. Maintaining the INFERNO requires disassembling the engine and lubricating/cleaning/replacing the O-Rings.
For detailed instructions, please see the Owner’s Manual for your engine.
For detailed instructions on the solenoid, please see the Solenoid Maintenance Guide.
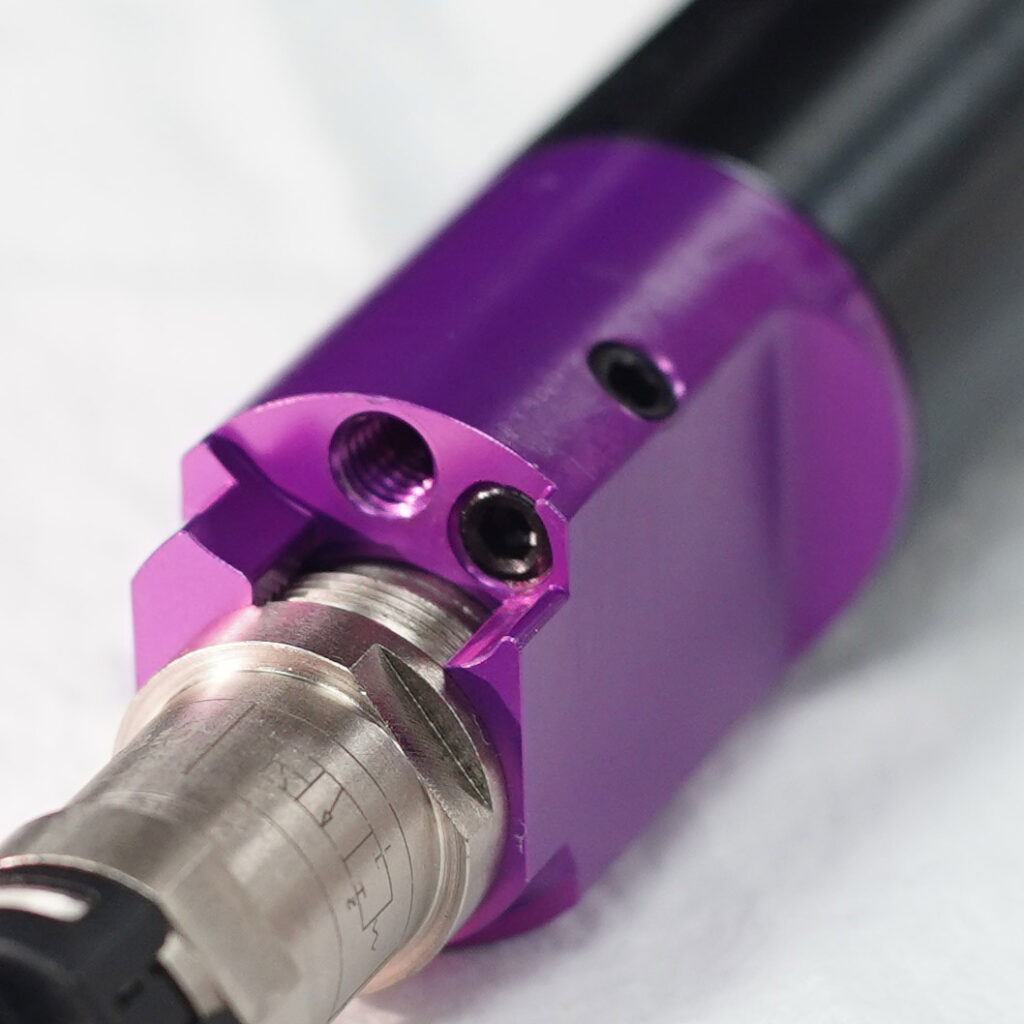
Troubleshooting INFERNO/Reaper Air Leaks
If your INFERNO Gen 2 is leaking, use this diagram to determine which O-ring may be faulty. For example, if your engine is leaking from around the nozzle, you should check the location and condition of O-ring #4.
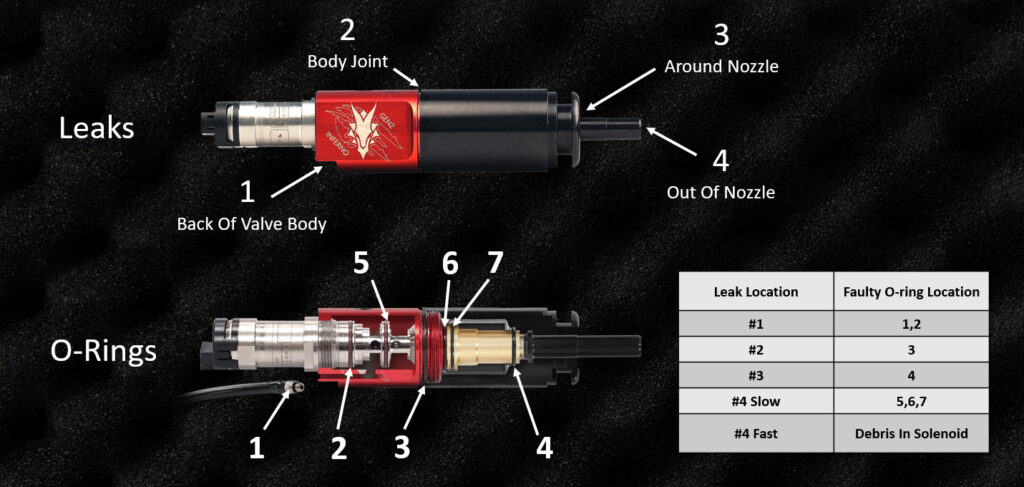
For instructions in replacing an O-ring, please see the INFERNO Gen 2 Owner’s Manual.
If your INFERNO Gen 2 is leaking, use this diagram to determine which O-ring may be faulty. For example, if your engine is leaking from around the nozzle, you should check the location and condition of O-ring #4.
For instructions in replacing an O-ring, please see the INFERNO Gen 2 Owner’s Manual.
Cylinder Plugs
The cylinder plugs are part of the manufacturing process and are not adjustable or removable. Never attempt to remove or adjust the cylinder plugs. Doing so will cause leaking and engine malfunction. Already done it? Follow these steps…
- Remove the valve from the engine.
- Clean the threads of the plug(s) and valve housing thoroughly with acetone or fingernail polish remover and a sharp tool like an O-ring pick.
- Apply a small amount of black Vibra-Tite super glue or Loctite to the cylinder plug(s) threads and work it completely around the threads.
- Reinstall the cylinder plug(s) flush with the outside of the valve housing. DO NOT screw the plug in all the way as it may damage the valve.
- Allow to dry for at least one hour.
- Attach an air source and ensure an air-tight seal.
Airflow Animation
See also: Solenoid Leaks